Photo Tips – Chromatic Aberration – Question: What is that ugly green outline on objects at or near the edge of the frame and how do I get rid of it? I had this same issue early on until I learned how to defeat it in camera. There is a sweet spot for every lens and it’s normally in the middle of its aperture’s range. Rule of thumb, stop it down a few in these shooting conditions. You’ll recognize the conditions after you’ve experienced them a few times.

Photo Tips – Chromatic Aberration
What you are seeing is called chromatic aberration (often just called “color fringing”). That green outline on your high-contrast edges is entirely an optical lens issue, but thankfully, it’s very easy to fix.
What is Chromatic Aberration?
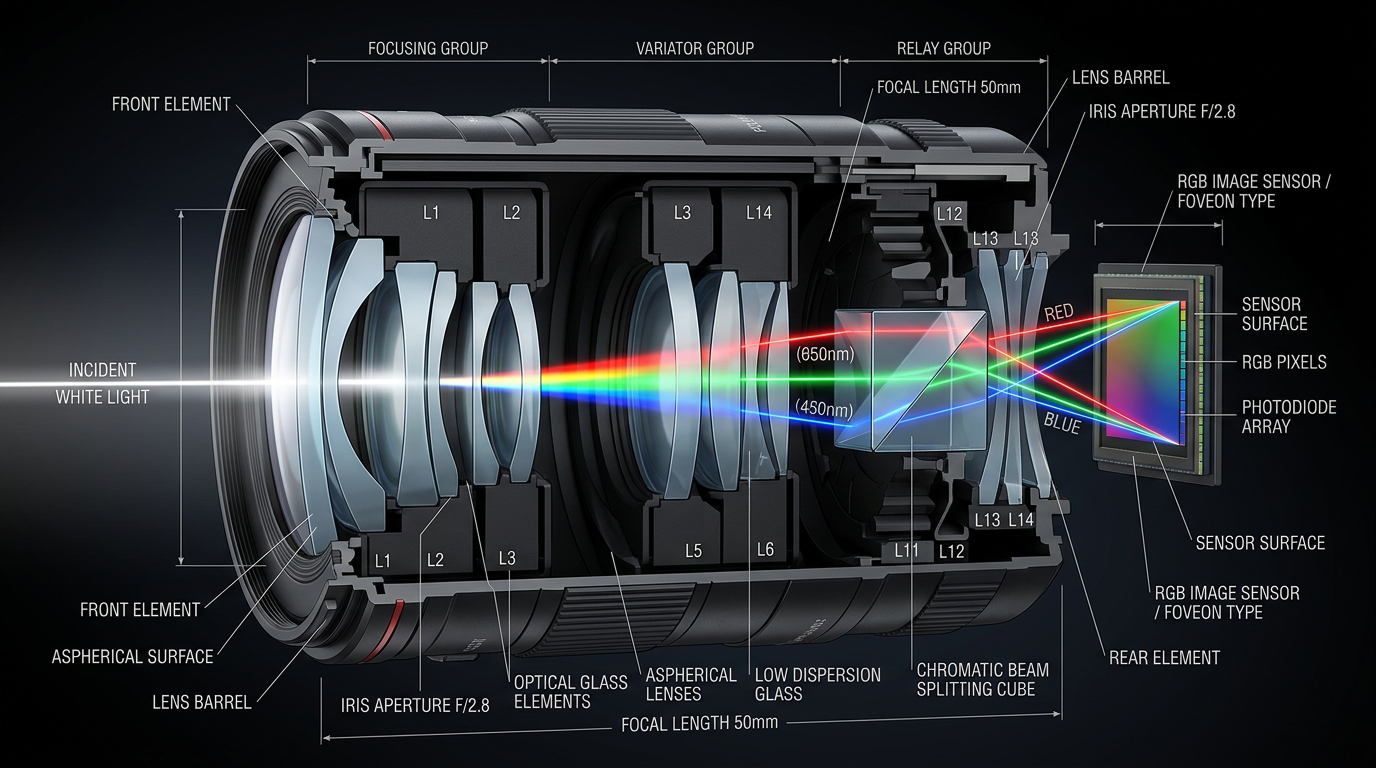
When light passes through your camera lens, the lens acts like a prism, bending different colors (wavelengths) of light at slightly different angles.
- The Problem: Ideally, all colors should focus on the exact same spot on your sensor. When they don’t quite line up, you get a soft, colored halo around the edges of your subject—especially where dark objects meet a bright background (like dark tree branches against a bright sky, or the edge of a bird’s feathers).
- The Flavor: Green and magenta fringing usually point to lateral chromatic aberration (spreading toward the corners of your frame) or longitudinal aberration (occurring just ahead or behind the exact point of focus, common in wide-open, fast prime lenses).
How to Adjust and Remove It
Modern editing software can wipe this out with a single click. Here is the standard protocol using raw processors like Lightroom, Adobe Camera Raw, or similar tools:
1.Enable Profile Corrections: First Step.
Go to your software’s Lens Corrections panel. Check the box that says “Remove Chromatic Aberration.” For 90% of images, the software reads your lens data and automatically cleans up the fringe.
2.Switch to Manual Defringe: If the auto-click misses some.
If you still see a faint green edge, click over to the Manual tab within that same Lens Corrections panel.
3.Use the Eyedropper Tool:Targeted Selection.
Select the Defringe Eyedropper tool. Zoom in close (to 100% or 200%) on the affected edge, and click directly on the green tinge. I find this to be the best for me, zoomed in, I can see the edit working and not overdo it.
4.Fine-Tune the Green Sliders: Final Polish.
If the eyedropper isn’t perfect, manually nudge the Green Amount slider to the right until the fringe disappears. You can also slightly widen the Green Hue slider range if the fringe has a slightly yellowish-green or cyan-green tint, expanding the software’s target zone.
Pro Tip for the Field: If you want to minimize this before you even take the shot, stop down your aperture by one or two full stops (for example, moving from f/2.8 to f/5.6 or f/8). Lenses are optically sharper and exhibit significantly less color fringing toward the middle of their aperture range than they do wide open.
To repeat for clarity – Photo Tips – Chromatic Aberration
That green line right around the edge of your subject is almost always lateral chromatic aberration. It gets more noticeable the closer you get to the edges and corners of your frame.
Because it happens at the outer edges of the image circle, it is incredibly easy for software to map out and erase.
Photo Tips – Chromatic Aberration –Why It Clusters Near the Edges
As light travels through the center of your lens, it goes straight through with very little bending. But as light hits the curved glass near the outer edges of the lens to hit the corners of your sensor, it bends at a sharp angle.
Because different colors of light bend at different rates:
- The blue/magenta wavelengths land in one spot.
- The green/red wavelengths spread out slightly wider.
- The result is that distinct green outline hugging the side of your subject that faces away from the center of the frame.
The Precision Fix
Under Lens Corrections there are Profile (global) & Manual corrections tabs. You use a set Profile of Lens corrections tuned for your lens. If the global “Remove Chromatic Aberration” checkbox didn’t completely melt it away, the manual sliders will finish the job. When you look at the Manual Defringe section, you will see a slider specifically for the Green Hue.
| Control | Action | What It Does |
| Green Amount | Push from 0 up to 5 or 10 | Controls how much purple/green desaturation is applied to the fringe. |
| Green Hue | Expand or shift the split-bar | Adjusts the exact shade of green targeted. Default is usually 40 to 60. If your fringe is a yellowish-green, slide the left bar down toward 35. If it’s a cyan-green, slide the right bar up toward 70. |
A Quick Warning: Don’t crank the “Green Amount” slider all the way to maximum (
20) right away. If your subject has actual green elements in it, like a bird perched on a mossy branch or foliage, over-defringing will accidentally strip the natural green out of those parts of your photo, turning them a dull gray. Only push the slider as far as needed to make the edge outline disappear…remember to zoom in.
These are easy fixes in post processing. The thing to know is that it isn’t anything you’re necessarily doing wrong. It is inherent in optical lenses. They typically work better in the f4 to f8 range – somewhere in the middle of their operating range is the norm. But that doesn’t mean you have to miss a shot or throw it away either. This is a relatively easy fix if you know how to use it. If you open up Lightroom and follow along with what I just explained, using any photo you want – just to see how it works. The problem is that few know where to look for it, or they have seen it ‘accidentally’ in their travels through the menus but had no clue what that was about, and so pretended that part wasn’t there and never scrolled that far down the list of tools again.
If you hadn’t guessed I was actually describing myself not too long ago. The lesson holds for all of us though; whether it occurs to us naturally or as with me, by blind luck – because I zoomed in to see just how crisp I could get at great distances, and saw all this green crap at the edge of anything dark against a light background and away from the focus area.
Early on I was a wicked pixel-peeper. I would throw out anything with the slightest fault because it wasn’t perfect out of the camera if I kept twenty of two-hundred images, I considered that a good shoot. Though that is still the goal, I now know it isn’t an always achievable one. We strive for perfection but rarely reach it, and that’s what this is all about. All this light chasing and technique, coupled with a huge pile of education and all the photo books on earth written by anyone who is anyone, and all the gear money can buy…and it still all comes down to the realization that it isn’t only about the shot and what did or didn’t go right, but it is always about your heart and soul being in every single click. If that’s the case when you go out to shoot, then approach your post-processing with the same ethos as as you would your shooting. Send your friends on the magic carpet ride of your imaging. It’s a story – this life. So, visually tell it like it is.
Popi luvs ya!